Manually installing Google Analytics tag in WordPress is not recommended – Here’s why.
If you add your tracking code in wp-header (header.php), everytime you update your theme, the code will be removed, and you will be forced to add it again, and lose some stats during that time. Here’s a better way of doing it.
Table of content:
Get the tracking codes from Google Analytics
Hopefully you have already created a Google Analytics account, if not, it’s super easy, just head over to https://analytics.google.com follow their installation guide, make sure you’re installing a Web stream.
- After creating your account, head over to your Analytics dashboard, click on the Admin icon located in the bottom left corner.
- If you’re in the right property, click on Setup Assistant, then click on the arrow of Tag Installation.
- Choose your domain.
- There you will find both your Tracking ID / Measurement ID and Installation tag, both of which will be needed in the next steps.
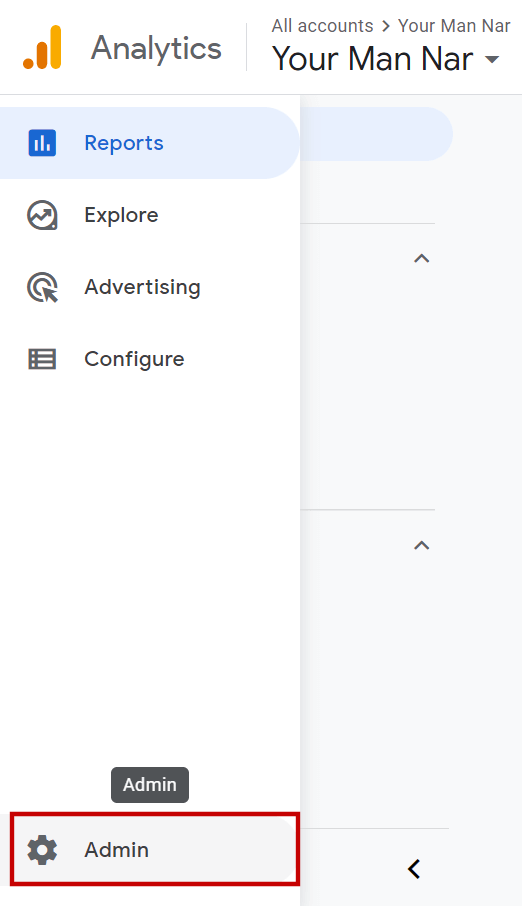
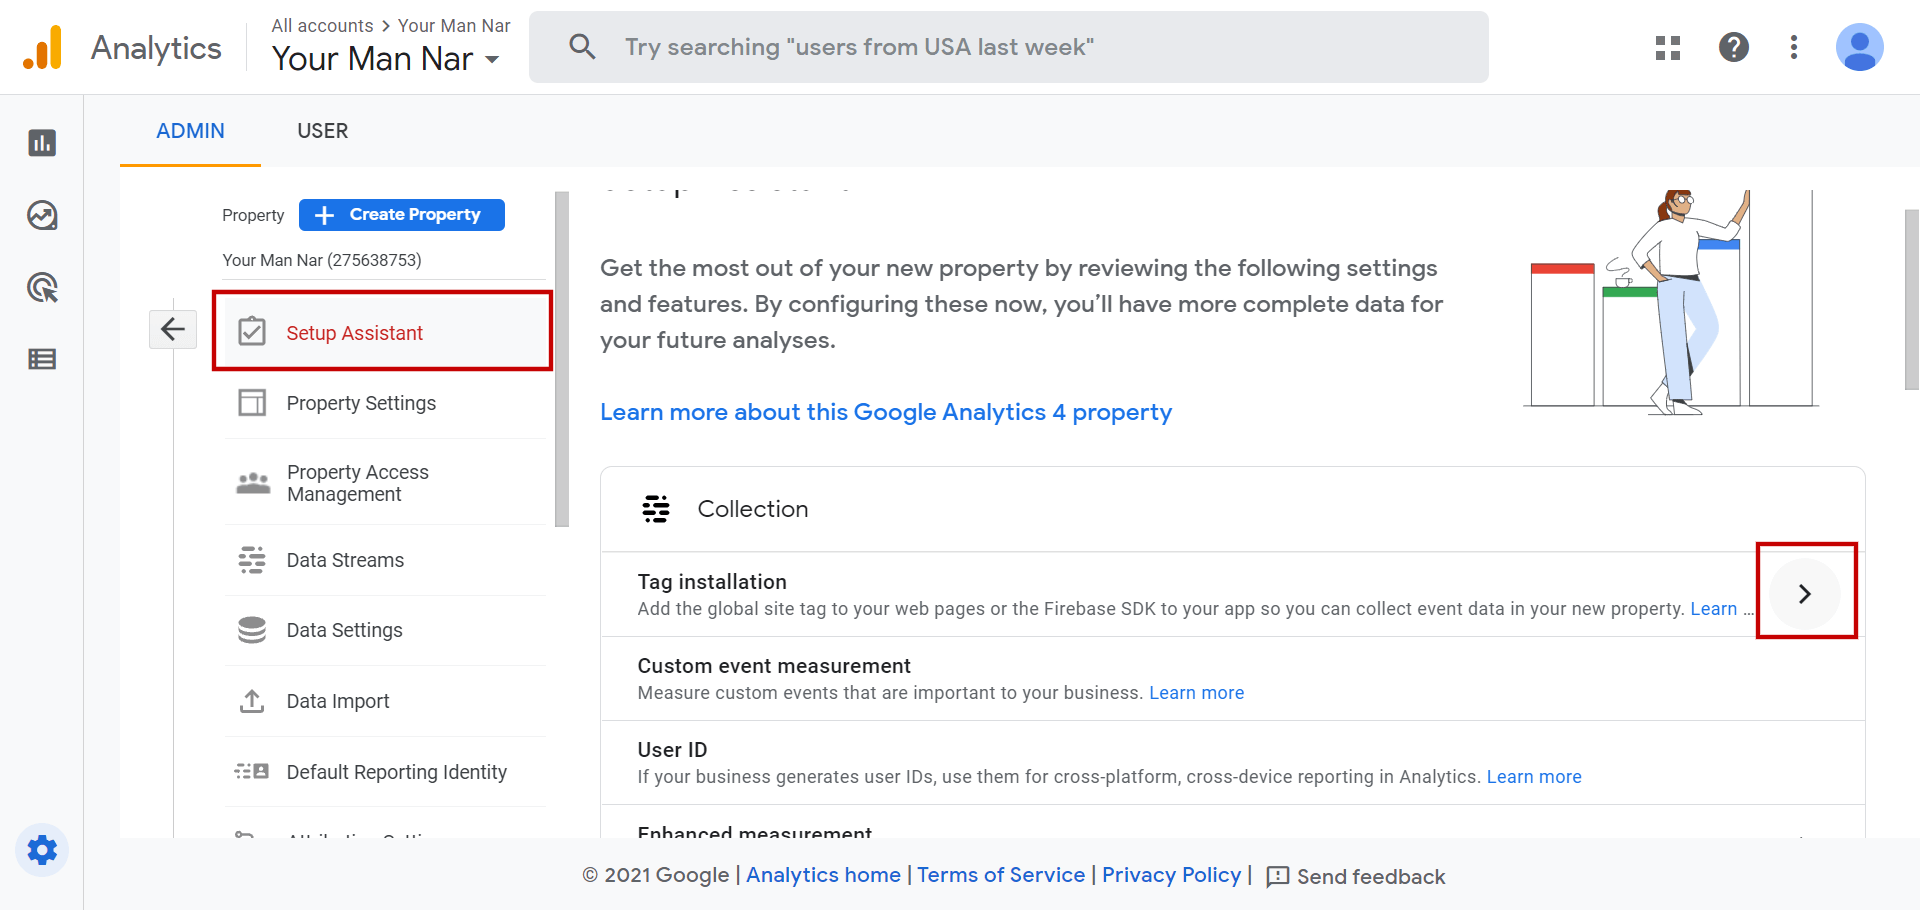
Now let’s get started
Install using plugins:
This one is rather easy, there are dozens of plugins that get the job done, but I will recommend only two, because both my and your time is limited 😉 So what this does, it adds the code using a plugin, so no matter how many times you update your theme, the code will still be injected in it.
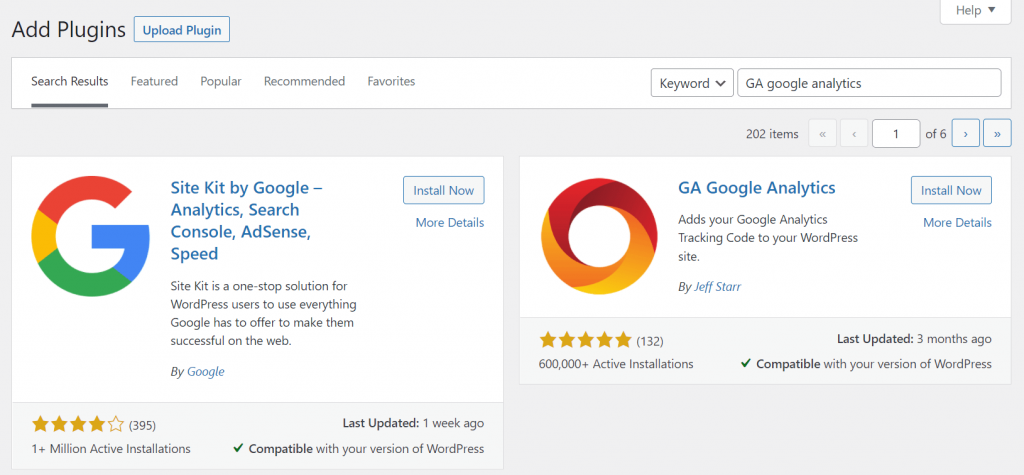
GA Google Analytics
The plugin is so intuitive and easy to use. Go to your Plugins -> Add New -> Search for “GA Google Analytics“. Find the plugin, install then activate.
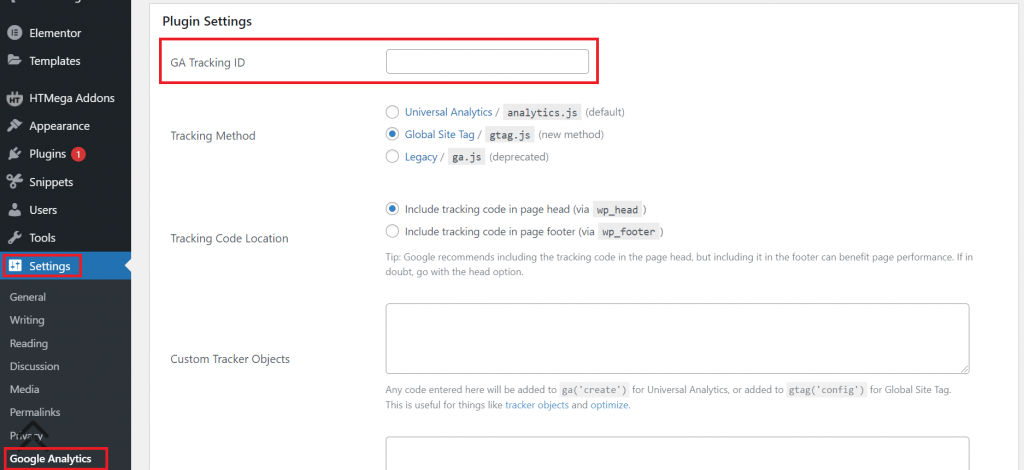
From your Settings -> Google Analytics
Enter your Google Analytics Tracking ID (Measurement ID) in the GA Tracking ID field. You can set it to be Global Site Tag, which installs Google’s Global Site Tag.
Header & Footer Code
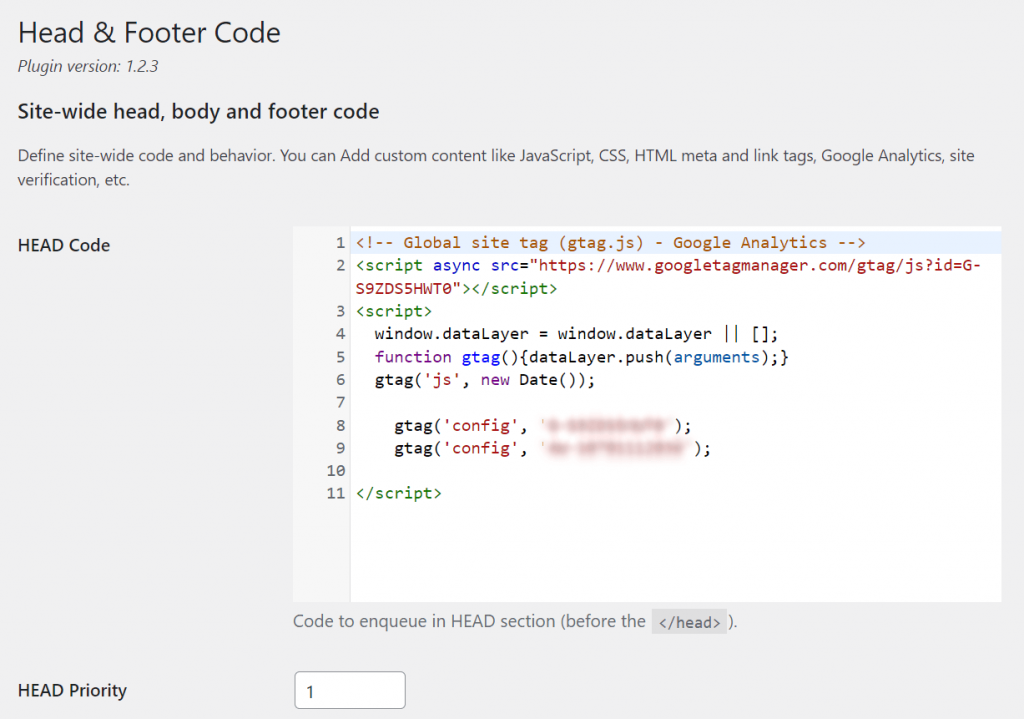
This plugin has nothing to do with Google, it just simply adds any code you wish in the <head> or <footer> sections. However, as you might have already guessed, yes, we will install Google’s tracking code.
Go to your Plugins -> Add New -> Search for “Head & Footer Code” -> Install then Activate.
Now, from Tools, go to Head & Footer Code -> Add your tracking code in the HEAD CODE section. Voiala!!!
Install by creating a child theme
A child theme is basically a theme that inherits all the stylings and functions of your main theme, but you can also make customizations in it that won’t affect your main theme. So no matter how many times you update your main theme, the code in the child theme will remain unchanged.
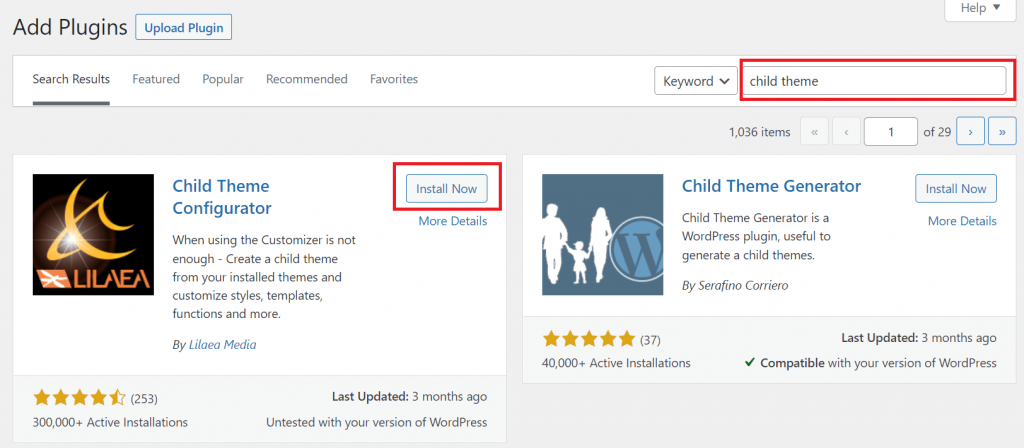
To create a child theme, go to Plugins -> Add New -> Search for “Child Theme” -> Install & Activate the “Child Theme Configurator” plugin.
Go to your Tools -> Child Themes
Choose your theme, click on Analyze and once everything’s good click on Create New Child Theme.

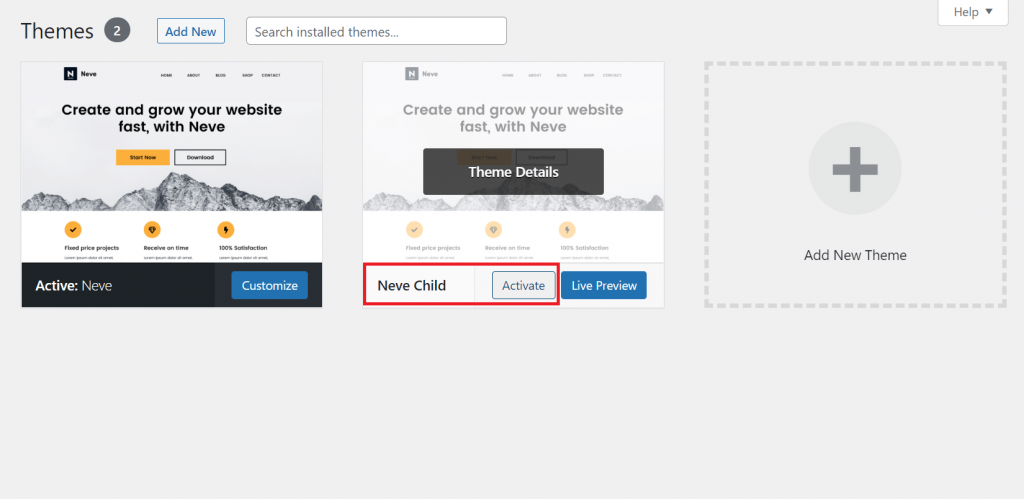
Go to Appearance -> Themes -> Activate the newly created Child Theme
Now, go to Appearance -> Theme Editor -> Theme Functions (functions.php)
Add the following code at the end of the codes:
add_action( 'wp_head', 'my_own_analytics', 20 );
function my_own_analytics() { ?>
// YOUR GA TRACKING CODE HERE
<?php
}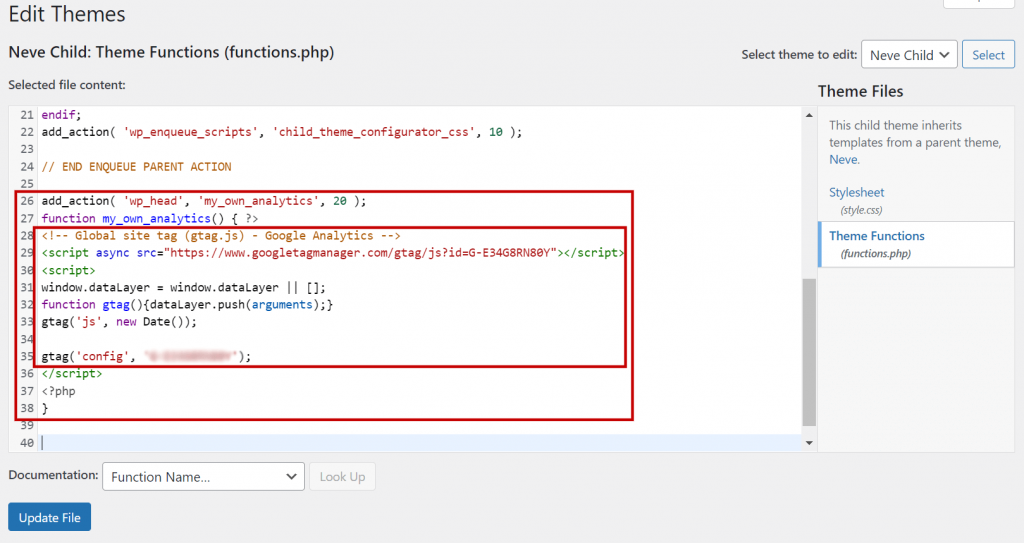
NOTE: Change the “// YOUR GA TRACKING CODE HERE” with your Google Analytics tracking code. Just like in the screenshot (lines 28-35), I have blurred my GA tracking code tho to avoid any misconceptions.
Related articles:
Improving your Google search results – Optimizing SEO
Connecting Cloudflare to your website – FREE SSL & faster website


