So you want your website’s menu to be vertical, no problem. You don’t want to buy Elementor pro, no problem. You want to have a vertical menu for free? No problem. Here’s how to create a sticky vertical menu on WordPress & Elementor – ALL FREE, bit manual work tho.
Table of content:
- The process
- Required plugins
- Structure the columns
- Create the menu
- Stick the element
- Add the sticky vertical menu to all pages
- Pros & cons
1. The process of creating a vertical sticky menu
- Install the necessary plugins
- Create the menu
- Set the columns’ structure and width
- Design your vertical menu
- Add a sticky property to it
- Copy and paste your menu wherever necessary
[If you want to create a horizontal sticky transparent header on Elementor for free]
2. Required plugins:
Creating a vertical menu for free is not hard at all, you would just need some extra plugins to make things happen (all safe plugins).
- Elementor (free version) – The drag and drop website builder is super amazing, and is a must for this tutorial.
- Sticky Menu (or Anything!) on Scroll – This plug in is required to stick the vertical menu on scrolling the page, so that the menu stays available and reachable when users scroll down your page.
- HT Mega – Absolute Addons for Elementor Page Builder OR Elementor – Header, Footer & Blocks – Any of the two plugins work (or any other plug in that has a nav menu widget which supports a vertical style)
3. Structure the columns:
Ok, let’s get started, firstly, go to pages -> add new -> Edit with Elementor
- Add a new section and choose two columns.
- Go to the layout settings of the left column, choose the width to be 30% (Or the width you want it to be)
- In the layout settings choose the vertical alignment to be top (Unless you want otherwise)
- In the advanced tab of the column edit settings, add a CSS ID to the column (i.e sticky_menu)
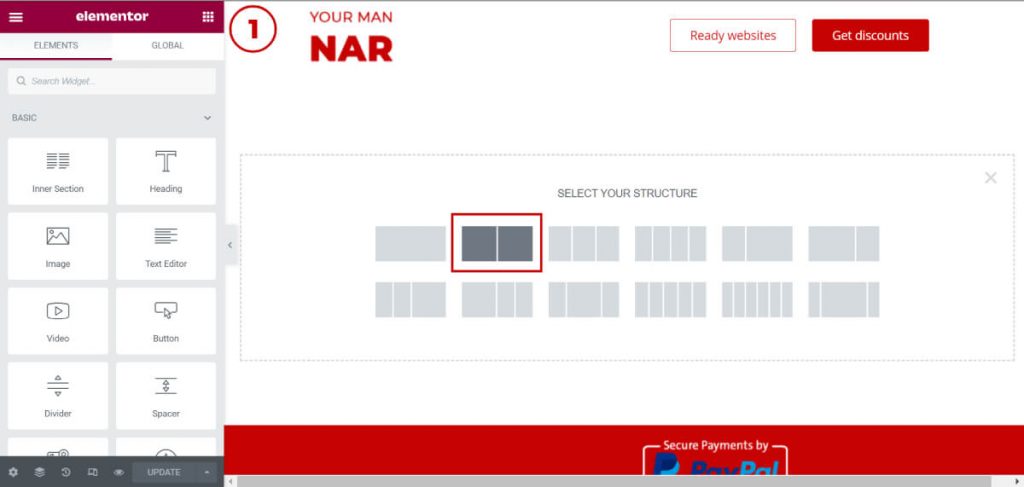
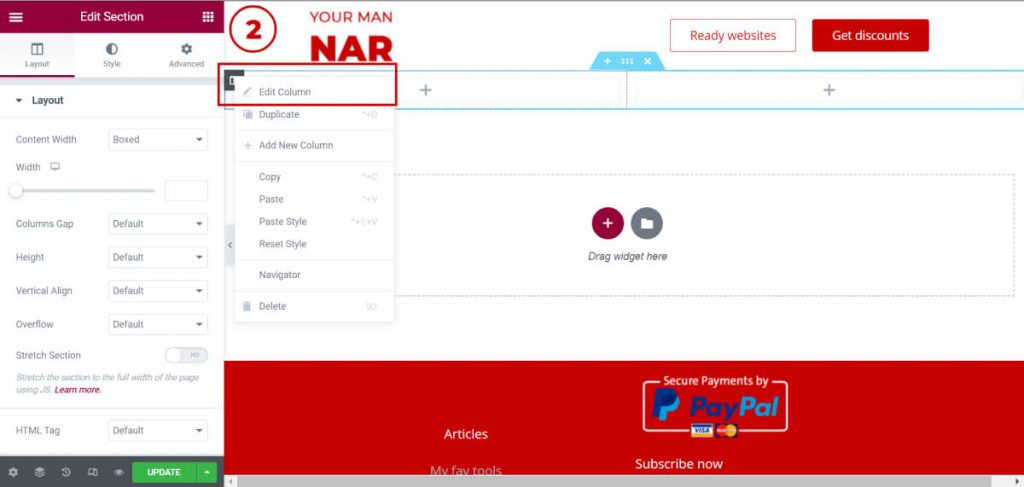
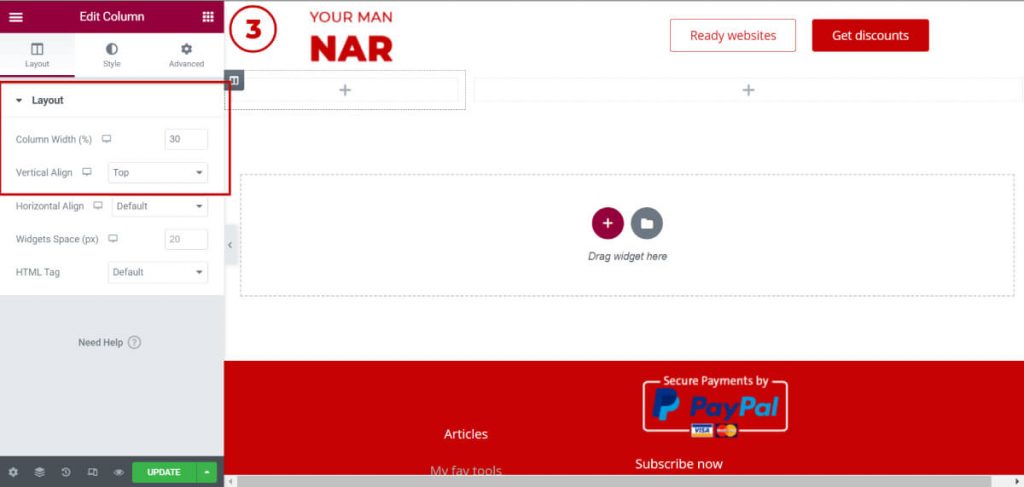
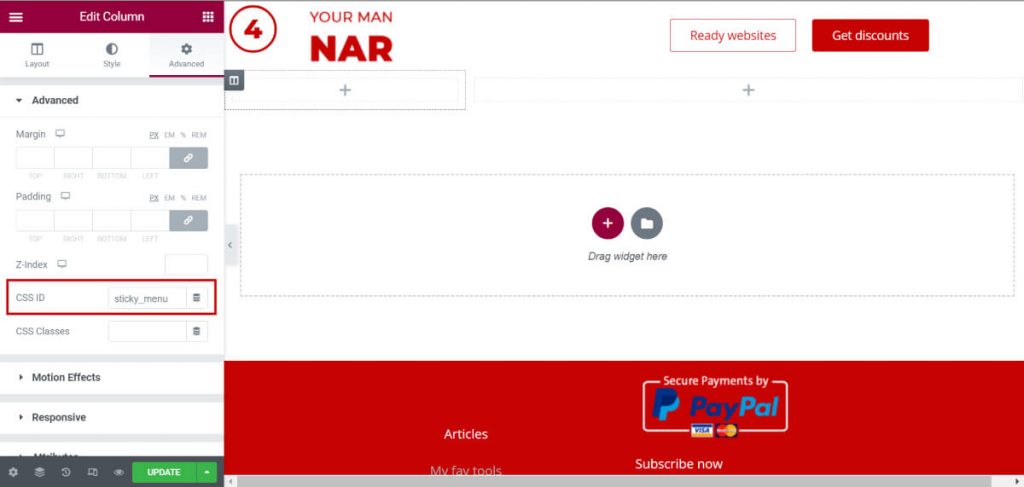
4. Create & design the menu:
Create the menu:
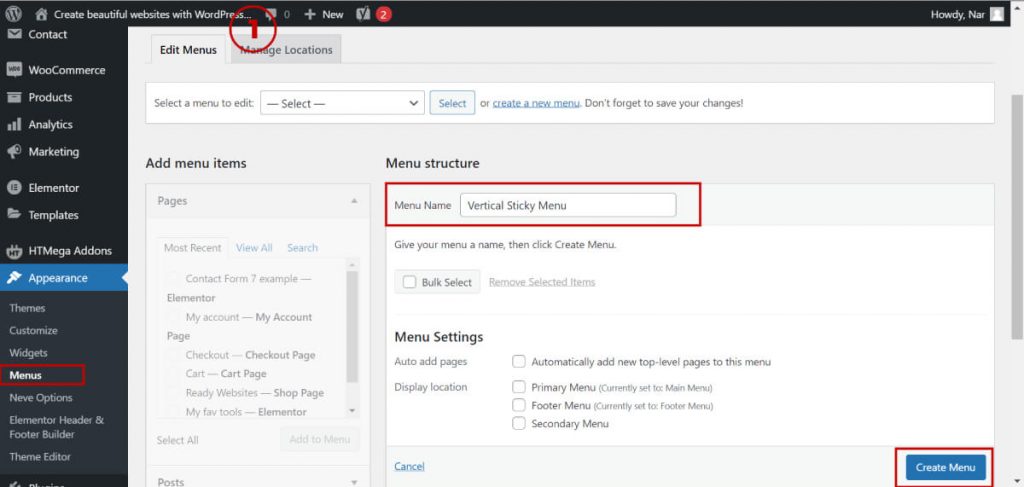
From your WordPress dashboard, go to Appearance -> Menus
- Enter the menu name -> Click on create
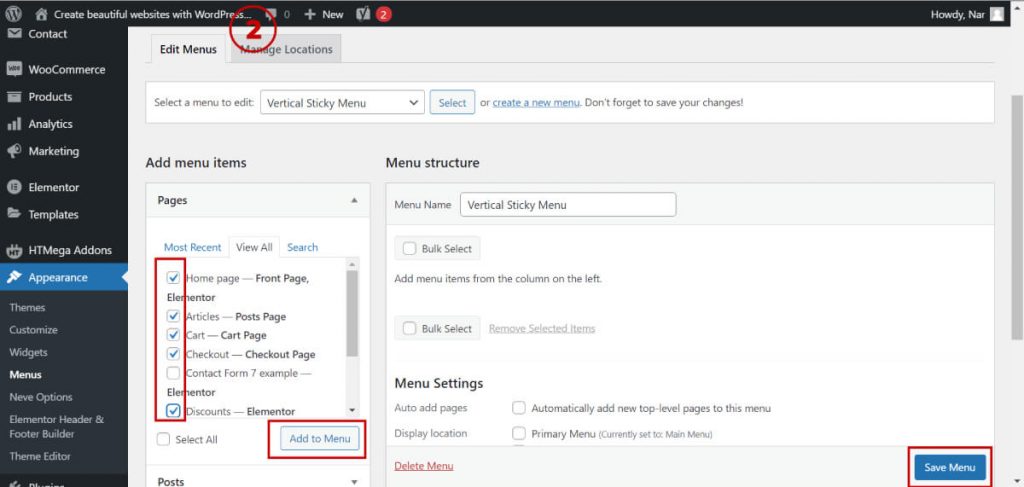
- Add from the left menu, check the pages you want to add to your menu -> Add to Menu
Go back to the page where you created the 2 columns
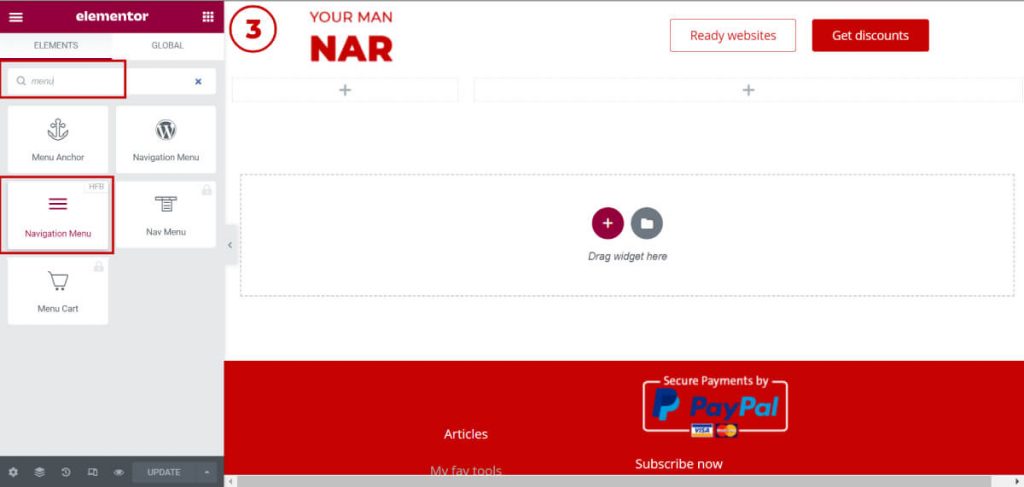
- Add the menu widget to the column
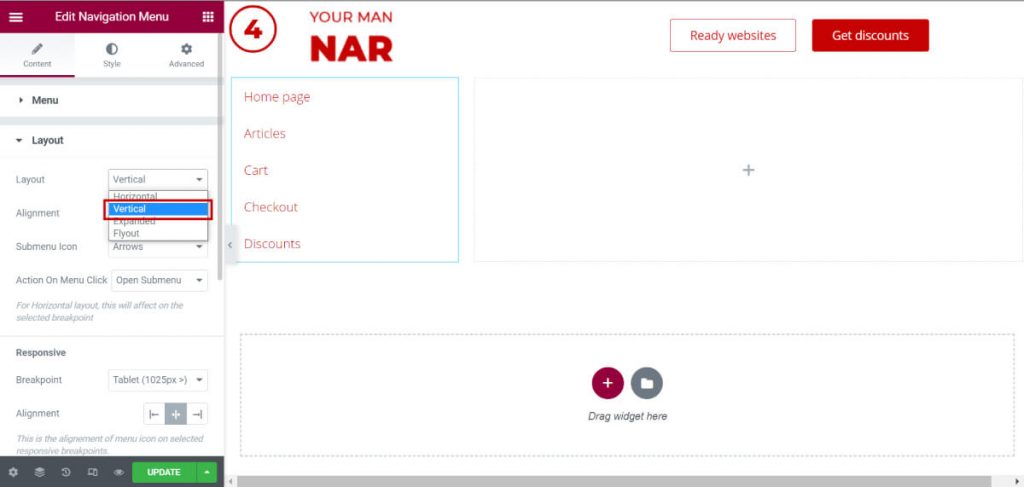
- Choose the layout to be vertical
Design your menu:
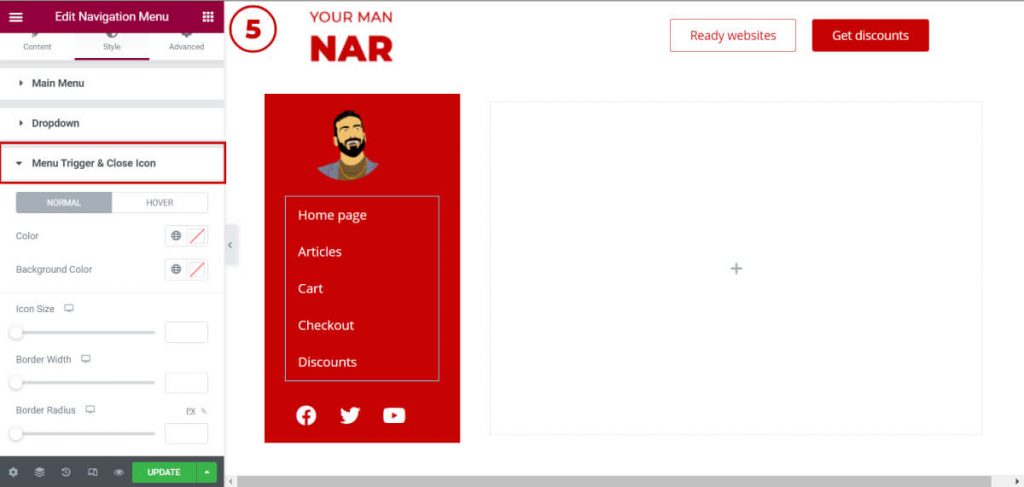
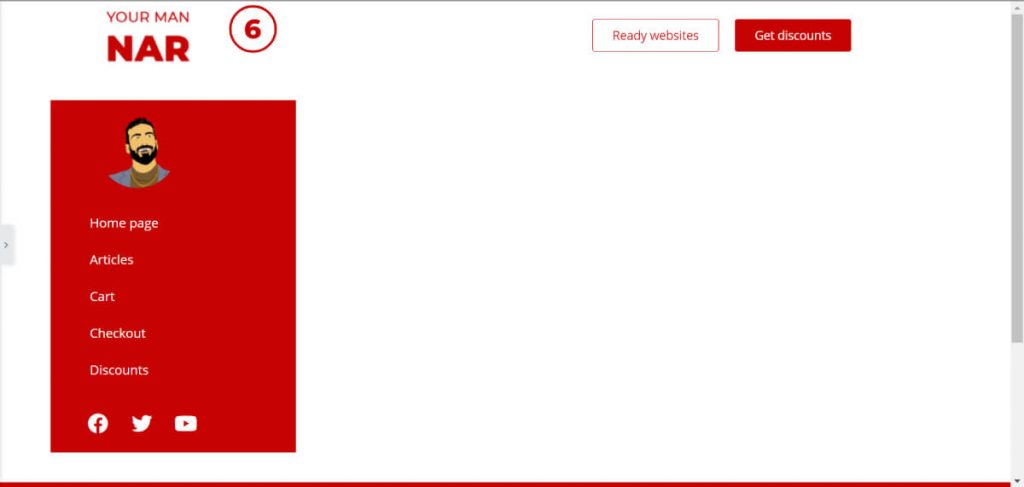
- As a best practice always add your logo in the menu, it will also help your visitors navigate through your website easier.
- Change the colors of your menu for all 3 states – Normal, Hover & Active
- Change the Menu Trigger & Close Icon colors (For mobile & tablet devices)
- Add social media icons
5. Stick the menu:
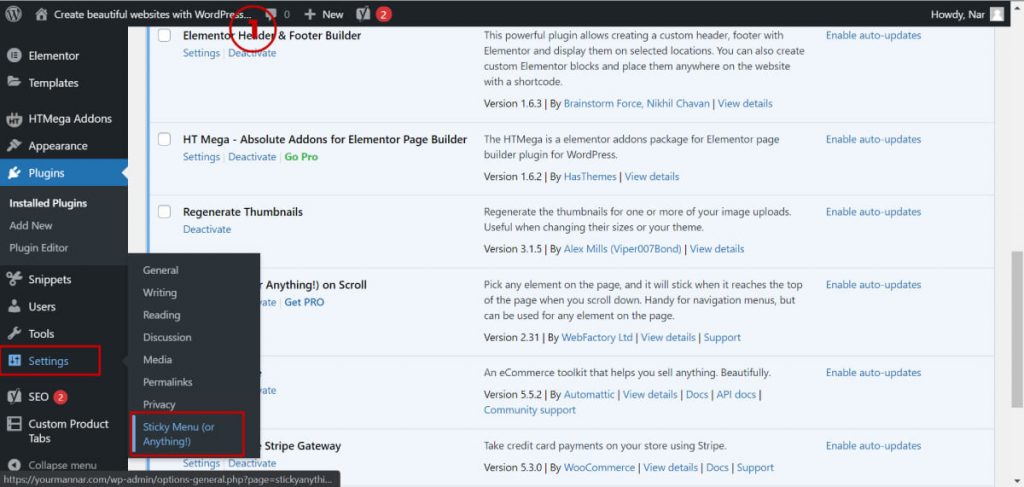
- From your WordPress dashboard, firstly go to settings, then go to Sticky Menu (or Anything!)
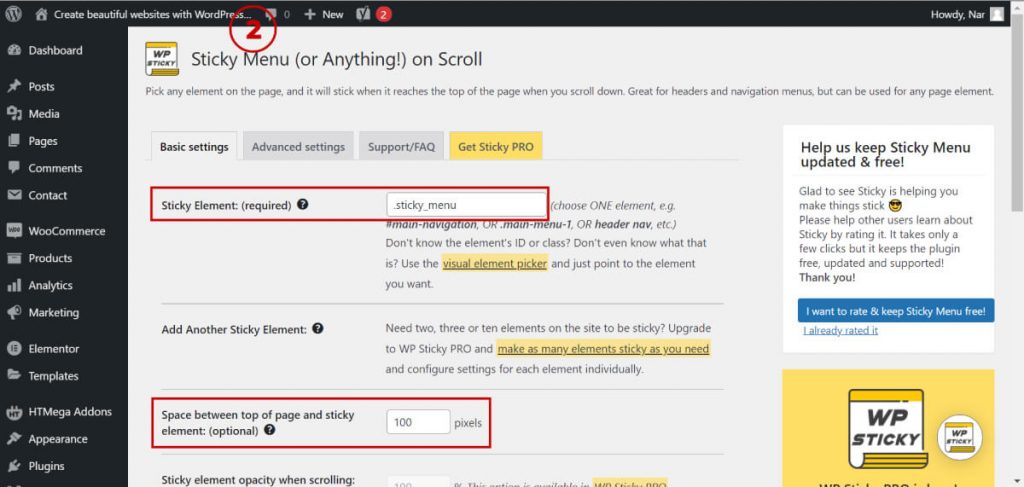
- In the Sticky Element: (required): field add the CSS ID you entered in the column CSS ID (i.e. sticky_menu)
Design the sticky menu:
- In the Space between top of page and sticky element: (optional): field, add the space you want the sticky menu to be from top of the page. In most cases you don’t need to add anything, but it’s up to you.
- If you want the menu to have a different background color when it’s sticky. Simply add the color you wish in the Background Color When Sticky: field.
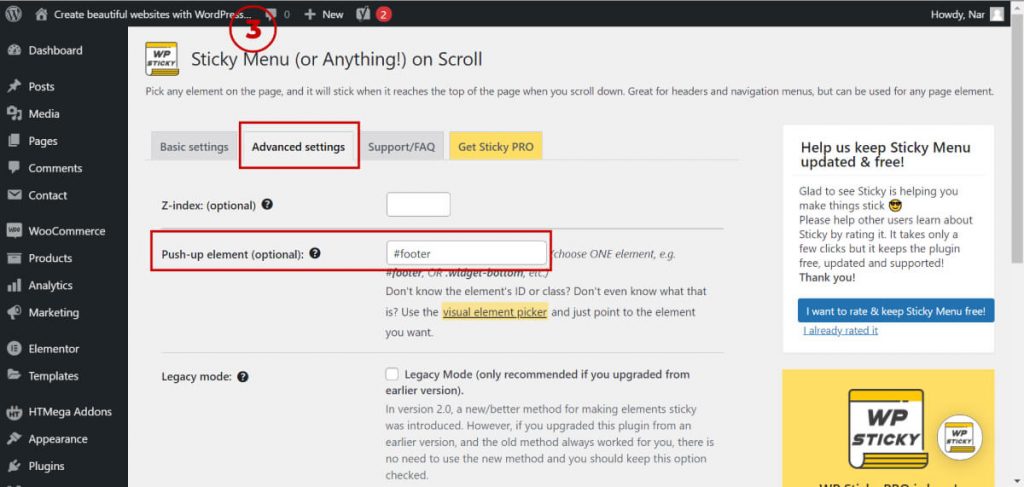
- If you want your menu to stop being sticky from a certain point (for example your footer).
- Add a CSS ID to the element you want the sticky to stop (the same way we added the sticky_menu ID, Edit Section -> Advanced -> CSS ID) – i.e. footer
- In the Sticky Menu (or Anything!) settings. Firstly, go to Advanced Settings, secondly, add the CSS ID in the Push-up element (optional): field. i.e. #footer
6. Add the sticky vertical menu to all pages:
This where the manual work comes in (unlike the pro version of Elementor).
For all other pages:
For every page that you want the sticky vertical menu to appear you have to:
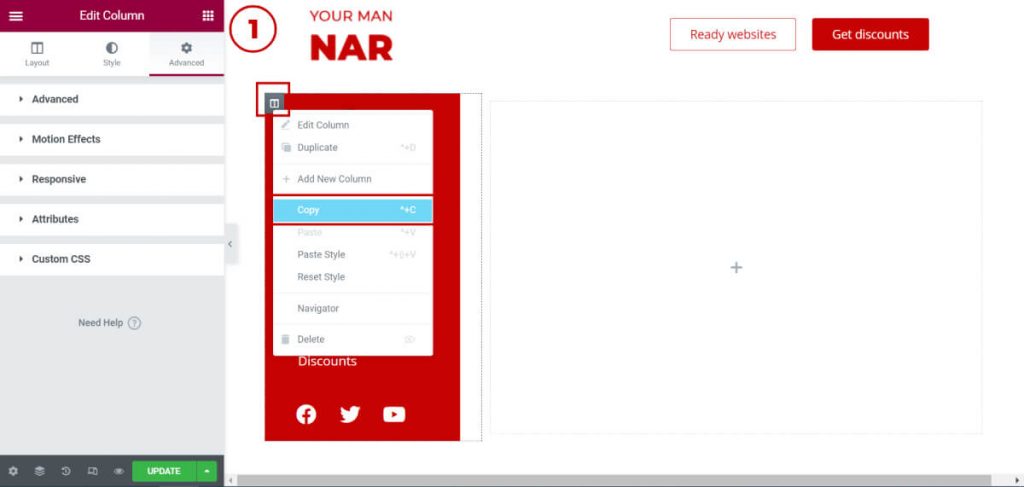
- Right click on the vertical menu column, and click copy
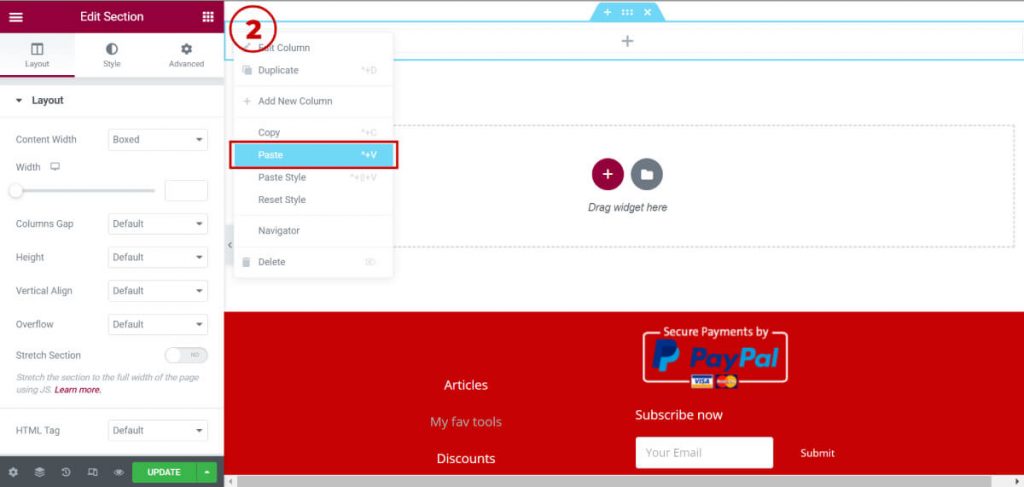
- Add a one column section to the new page
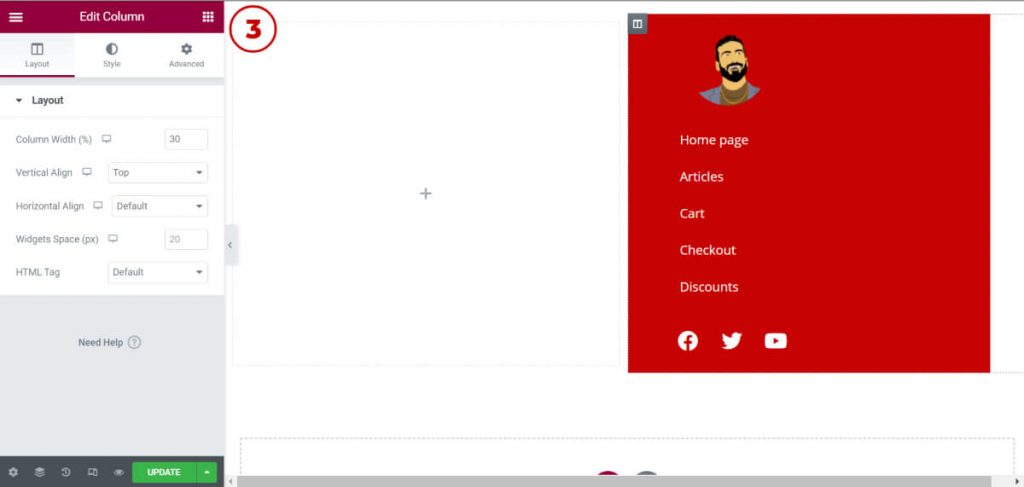
- Right click on the column icon on the new section, and choose paste
- Adjust the column position and width (30, or whatever you chose the width)
- If you entire section had custom paddings and margins, make sure to copy the section and paste the style to the new section (Just right click on the main section -> choose copy -> accordingly right click on the new section ->paste styles )
If your section has custom paddings & margins, make sure to copy and paste the style to the sections as well
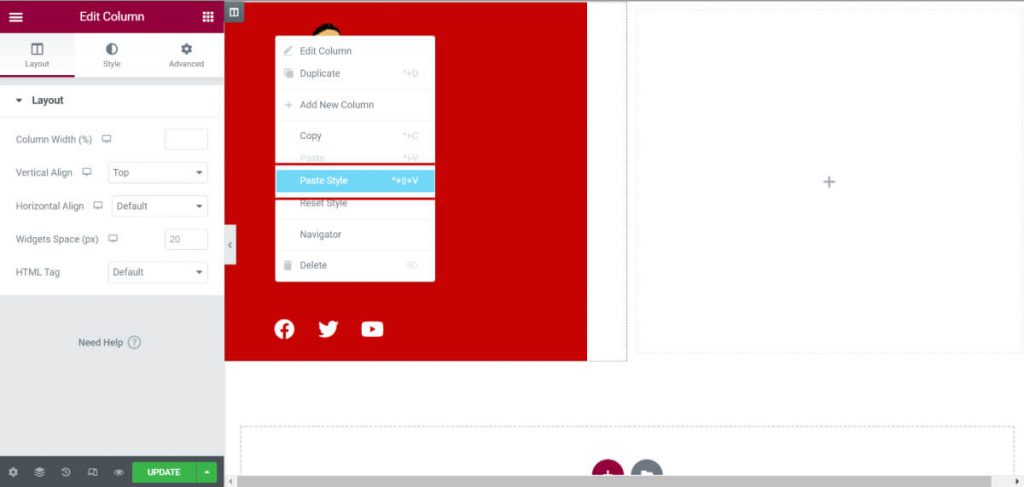
For all other sections:
Since your menu takes 30% of the width, and it will be sticky, make sure to make all other sections have 2 columns, the one under the sticky vertical menu 30% and the other 70%.
If you want the right section to be more than one column, you’d have to evenly divide the extra number of columns from the 70% share.
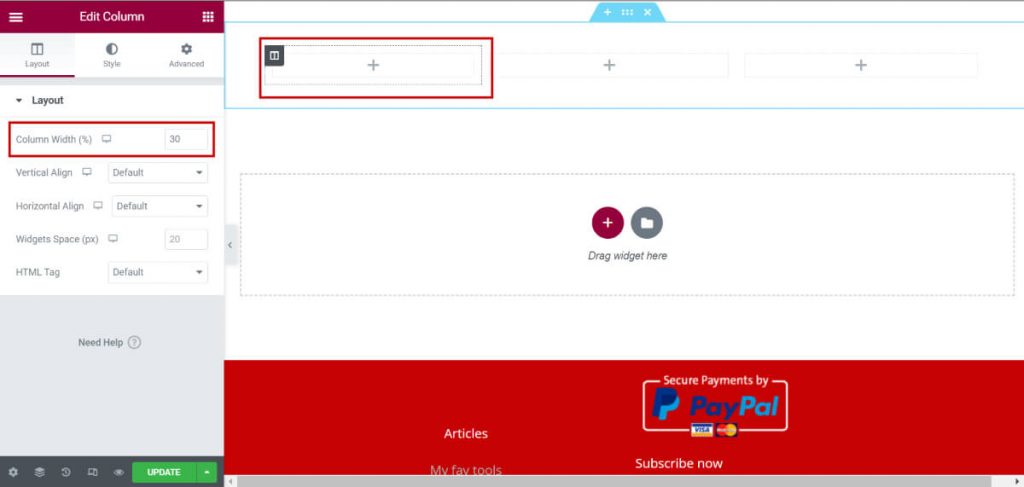
7. Pros & cons of free sticky vertical menu
Pros:
FREE
This version is free, this is obviously a great advantage.
Flexibility
You have the opportunity to customize each sticky vertical menu by its own. Although, this is not so recommended, but in some design cases, you might want it to be different on every page.
Cons:
A lot of manual work
The method requires a lot of manual work to achieve absolute perfect result.
Update everywhere
If you wish to change a design element in the menu, you’d have to make the changes manually on all the pages where the sticky vertical menu is.
Bigger error margin
Since the method requires manual work, the margin error to have somewhere something different is bigger than usual. That’s why, I highly recommend, you copy and paste to make the error margin as small as possible.



Jeroen asked on Youtube: How do you get a transparent vertical menu?
Right click on the column’s edit section (not the section, but the column) -> Style -> Background -> Classic -> Color -> #FFFFFF00
You can find 2 screenshots showing the process.
giorgio vicini Asked on YouTube: in the video with vertical menu, as in many other videos and teachers, you show a menu without talking about sub items. For these items what can i do?????
Hey Girorgio, by sub items do you menu sub menu? The items you get when you hover over the menu? If so, then it’s simple, just go to Appearance -> Menus -> Add the new menu item below the item you wish, and that’s it (screenshot 1). Then you can style the sub menu from Elementor -> Navigation Menu (HFB)-> Style -> Dropdown (screenshot 2).